Thursday, 9 April 2015

Carbon Cycle Activities

Recently we have been working on activities to promote sustainable living. As part of this study the children calculated their carbon footprint. In order to fully understand the weight of their carbon footprint I created this carbon cycle chart.


The chart contains movable cards for each part of the carbon cycle. On the back is a description of that card and it's process.


 Once we laid out all the cards and I finished my presentation, the children were silent and their faces displayed the shock of realisation that their actions are destroying the earth. One child immediately pointed out that more carbon is being released into the atmosphere then is taken away. We discussed the side effects of excessive carbon in the atmosphere. The children left the lesson insisting that they must do something to improve the situation.


The carbon footprint worksheet was a great follow up. Each child filled out a form and all were disgusted by their results. I am sure they each went home and began thinking about switching off the lights and reusing plastic bottles.


You can download the free carbon footprint worksheet from here.

Monday, 18 August 2014

Infinity Street

Not long ago I was introduced to a brilliant counting activity which has been invented for Montessori classrooms; Infinity Street. This activity is designed to give children the opportunity to practice reading and making numbers beyond a trillion. 


 Each number family is represented in a house on infinity street. In each house lives the units, tens and hundreds. The houses increase with size as the numbers get larger.

The number families represented on this street are, units, thousands, millions, billions, trillions, quadrillions, quintillion, and sextillions. Of course the houses can go on and the numbers can increase but I found that this was sufficient for the children. Each number family name was written on a card which also contained a comma.

This activity is very easy to make. It took me about 40mins to cut all the houses in yellow foam and the colour strips in red, blue and green. 


Here is the activity in use by some children in the lower elementary classroom. The coloured strips are actually made for the beads to fit.  After the child lays out all the houses, they select beads at random or to make a chosen number. Once the beads have been placed in each house, the child practices reading the number using the cards to help. 


In this particular photo the child made the number 111,659,232,875,768,888,111,466. To read the number the child said; one hundred and eleven sextillions, six hundred and fifty nine quintillions, two hundred and thirty two quadrillions, eight hundred and seventy five trillions, seven hundred and sixty eight billions, eight hundred and eighty eight millions, one hundred and eleven thousands, four hundred and sixty six. 

It is truly amazing that a child of 6 or 7 can read numbers so large with accuracy :)

As will all other Montessori materials, the child will gradually work away from using this activity to being able to read the numbers in complete abstractions. 

Saturday, 26 April 2014

Introduction To The Checkerboard Lesson

The checkerboard is one of my favourite pieces of Montessori materials. 5 years ago I blogged about this homemade checker board which I made  from felt.  

I have had great success introducing the checkerboard to my students. However, I have noticed that some students do find it difficult to understand the place value of each square on the checkerboard. I was recently introduced to this preliminary exercise which I have now started using in my elementary class. This lesson is great and  has been very popular :).  

It is very easy to make this activity. Each of the squares is cut out from felt. They measure 4cmx4cm. You need 10 green, 9 blue and 9 red. 
I then made label cards for each square. I have uploaded the file here to share with you all for free. 


When presenting this lesson you start with the unit row [bottom row]. You place the green square at the bottom right of your mat and label it. To the left of this you place the blue square, name as 'tens' and label. You continue placing the squares for this row until you have reached 1 million. Next you start on the tens rows by placing the ten square on the second row above the units and continue placing the squares and labeling until you reach ten million. The hundreds and thousands rows are built in the same way.

A fun extension to this lesson is to play a card game. 2-3 children can randomly select a pile of cards. Each child then has to place the labels on the correct square. The winner is the child who first places all the labels correct!

Let me know if you make and try this lesson. I'd love to know how it works for others. 

Monday, 10 March 2014

Sentence Analysis - Post 1

Little-N has recently become obsessed with the Sentence Analysis work. In this activity the child analyses sentences using a series of charts and symbols. In the picture above, the sentence contained a verb, subject and direct object. I downloaded this chart for free from here.
Sentence Analysis is a long and detailed study, which I usually begin with the child once they have studied all parts of speech [and know the grammar symbols]. The above chart is the simplest form. The child will progress to analyse sentences which contain conjunctions, adjectives, adverbs and more. Below is a picture of the complete set of materials. However, some training colleges may use different charts.
I decided to purchase the PDF set of materials from here. The file provides print out symbols and charts. Also included are step by step directions for presenting the materials. This homeschooling blog has a great post about Sentence Analysis. 

Above [sorry for the bad quality] Little-N is working on another Sentence Analysis lesson at home. He enjoyed it so much he wanted to do another lesson this evening! In the above photo, Little-N is analysing a sentence which contains to verbs and one subject. 

I'll post again soon with the next Sentence Analysis lesson we do.

Monday, 17 February 2014

Montessori Hierarchy Of Number Material

'
I recently got this wonderful material made for my class. This material provides children with a concrete representation of the quantities of numbers 1 through to 1,000,000. The familiarity of the colour coding and material, really supports each child to develop an understanding of the sizes of the large numbers compared to units.

 I used a large 50cm x 50cm x 50cm card board box for my million cube. We spray painted in it green. A grandfather of one of my students made the other pieces in wood. 


Here the million, thousand and unit cubes are stacked for comparison.


Here the hundred and hundred thousand squares are stacked.

My class had a lot of fun comparing the pieces and labelling with numerals. Next week I will be presenting another lesson which follows on from this and helps the children develop an understanding of numbers over a million.

Saturday, 14 December 2013

Cursive Writing Set

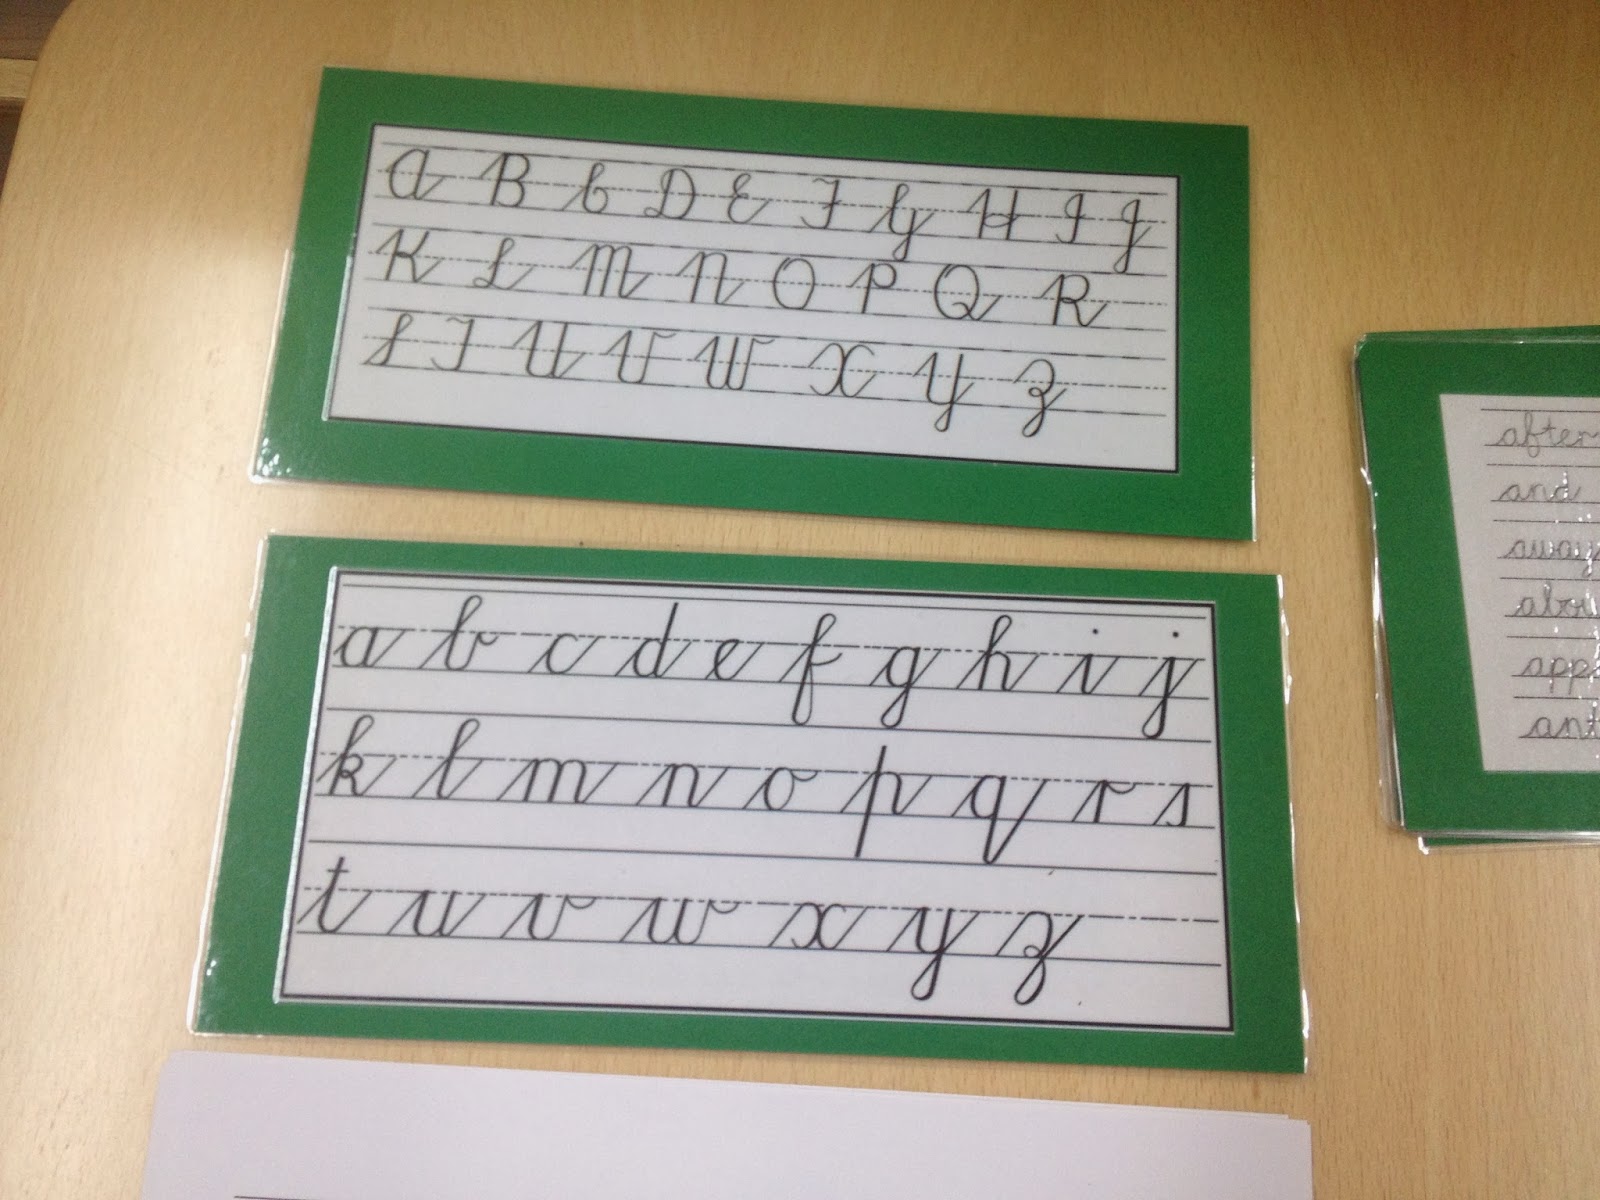
This year I made a set of cursive handwriting activities for my elementary class. So far the children have only been working with the Sassoon Montessori font and regular print. However, after much discussion in my college, I have decided that writing in cursive is much better for my class. Since my children are all elementary aged [6-11yrs] and I do not have to give them much instruction, I have set up these activities so that the children can naturally progress without much support from me.


This photo shows all the materials in the set. In the top left are the control cards which show the correct placements and formation for all lower case and capital letters. Below this are a few practice handwriting sheets that I downloaded from here.  These sheets focus on individual letters. These are the sheets the children start off with. Everything else is handwritten. I felt it was important for the children to see real writing instead of perfect printed text. In the top middle are a few lists of words which the children can copy out once they have practiced with all the letter sheets. In the top right are cards which contain phrases written on cursive paper. The children can choose a card and copy it into their cursive handwriting book [bottom of pic]. The final cards are phrases written in pen on plain paper. The children are shown how to place the line guides behind their plain paper and copy a phrase or choose their own phrase.


 Cursive writing control cards made using a download from here.

This is an example of a saying I wrote using a pen on plain paper. I have never before written in cursive and was surprised that it looks so lovely. Making the handwritten materials took a very long time but it has paid off. The children are so eager and excited to work through all the materials. Even the children who showed not interest in handwriting are now spending long periods of time practicing. In fact, last week I had two boys who worked on their cursive handwriting for almost the whole workcycle.

Sunday, 1 December 2013

Homophones, Homonyms and Homographs

Little-N has been working with homophones, homonyms and homographs. I introduced each group of words using concrete materials. For the initial homonyms presentation, I used a model of a dog [for the word bark], Bonsai [bark of a tree], a small tennis bat, a model of a black bat [animal], a bell [for ring], and an amethyst ring. Although the elementary child is older, they still find great pleasure and excitement in lessons that use concrete materials. Each objects was placed on the mat and labelled appropriately. The children then guessed what the lesson was about. After defining 'homonyms' the children spent time thinking of their own examples. I also encourage the children to use the dictionary to find new ones.

As follow up work, I have many drawers filled with word pairs which can be matched. Each word card has a definition which the children read and match. Since Little-N is 9 years he is ready for a more advanced look at homonyms. For him, I prepared sentences which contain homonyms. His job is to find the matching sentences and then symbolise the homonym using the grammar symbols.
Little-Ns next step is to write a poem or story full of homonyms.

P.s. As you can see Little-Ns hair is very long. He won't let me cut it. He is getting mistaken for a girl 80% of the time now, yet he doesn't seem to care!