Showing posts with label free download. Show all posts

Thursday, 29 October 2015

Great Lesson 1 : Types of Galaxies [Post 5]

Galaxies are another fantastic follow up to the first great lesson.

Since galaxies are incredibly beautiful, I wasn't satisfied with printing out pictures for this lesson. I wanted pictures that would inspire awe and creativity. So with a friend of mine, I created these galaxy pastel drawings. 

We first spoke about the formation of galaxies, recalling what was discussed in the great lesson. Next we introduced three types of galaxies; spiral, elliptical and irregular.  

Here is a layout of all three galaxies.
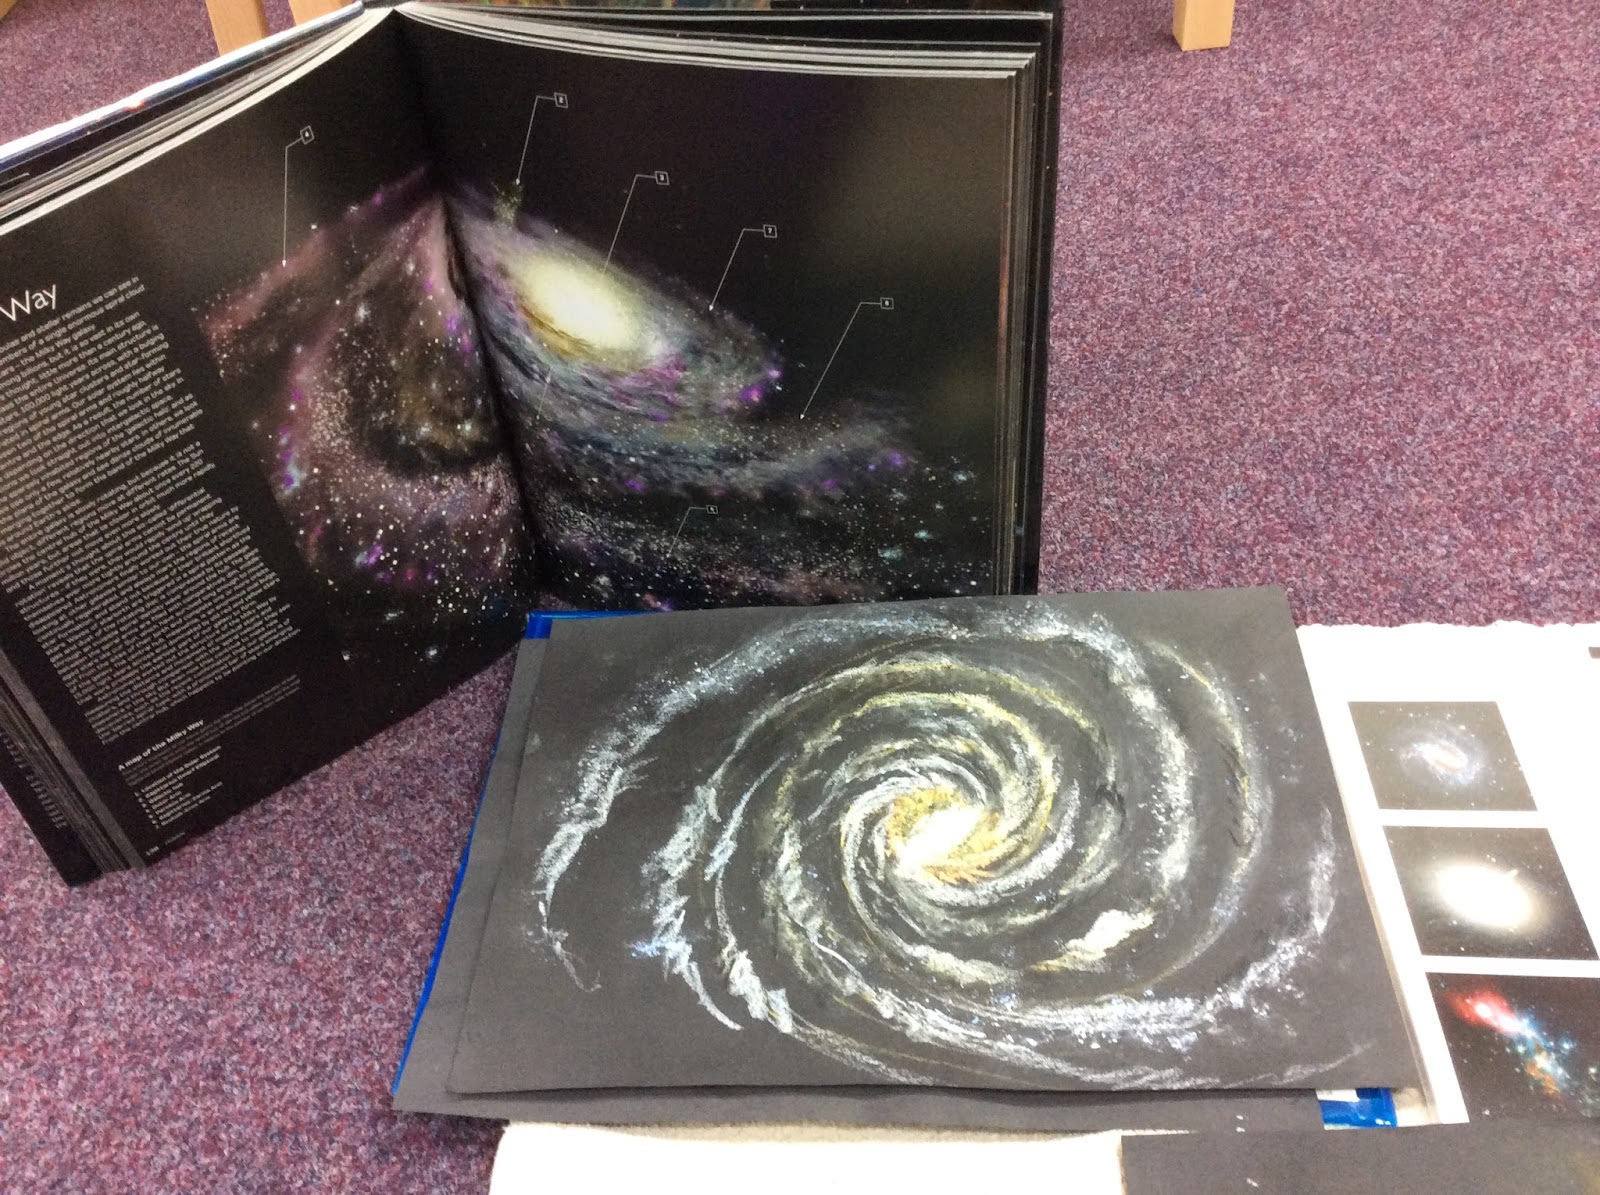
Spiral Galaxy

 Elliptical Galaxy

 Irregular Galaxy

We used this poster as a guide for the types of galaxies. This can be downloaded for free from my shop here.
http://thelearningark.com/content/types-galaxies

Next we looked at different galaxies which have been discovered. I made these 3-part cards for ten different galaxies.
These can also be downloaded for free on my site. 
(all photos were taken from Wikipedia)
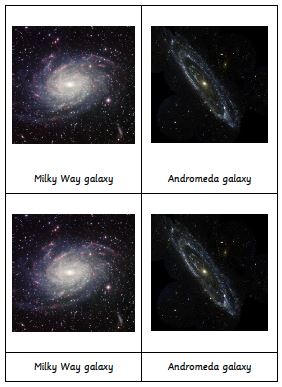
Children were encouraged to pick a galaxy and research it further.

This book fit perfectly with this lesson.


Of course, the children were inspired by the pastel pictures and eagerly drew their own. 


Here is an old photo of  Noah drawing spiral galaxies using pastels at the age of 9. As you can see he got right in and even smudged pastels on his face lol! Noah is now 11 years and he still enjoys this activity each time we tell the great lesson.

Saturday, 24 October 2015

Great Lesson 1: Volcano Studies [Post 4]

After telling the first great lesson each year, the most loved follow up work is always the volcano activities. Here are some ideas I use in my class and my children enjoy.


Volcano Experiment

Firstly, I always have two volcanoes on display. One is my grand big brilliant volcano which I use for lessons. The second is a much smaller one which children can use independently. The children are able to take out the smaller volcano anytime and follow the instructions to make it erupt. 

The main volcano in the picture shows my large grand one. Just behind the white box you can see the top of a smaller volcano.

In the white tray I have a supply of vinegar and baking soda. The children use a spatula to fill the volcano with baking soda and a pipette to add the vinegar. This way they don't use to much of the ingredients at once. 

As you can probably tell from the photos, these volcanoes are handmade. Both volcanoes have removable bottles which make them easy to clean. I used this youtube video, but did not follow the exact instruction.


Montessori Beginnings has another good tutorial on how to make a volcano.

Each of these volcanoes has a built in tray which holds the lava and mess from the eruption. This has been perfect for avoiding the terrible disasters I previously had when the volcanoes stands in a separate tray.


Parts of a Volcano

 Alongside the volcanoes, children will work with the part of the volcano cards. I have a set available at my store, shown below and available here. 


http://thelearningark.com/content/part-volacano


Alongside the volcano cards, the children use the above printout to make their own volcano booklet. This is available for free here. The picture of the volcano was taken from Free Colouring Pages.

Of course the volcanoes make appearances in various other lessons. Below, I was presenting a lesson on the use of a comma and a child decided that the volcano was the perfect prop to use.


Types of Volcanoes

I used this great chart to make three part cards for types of volcanoes. I am not sure who is the author of the chart so I can't share the cards. The chart is available here. 


Real Volcanoes

It is also great fun for the children to look at real volcanoes. 


Helpful garden has a free download for pictures of volcanoes. 


Pinay Homeschooler has a free set of volcano cards from around the world. 


Volcano Research

For children who have a great interest in volcanoes, I encourage them to carry out research on an actual volcano. The below picture shows research guidelines which the children use as a basis of their research. Unfortunately, I can't remember where the pictures came from so I can't share this. Sorry!


Make a Volcano Model

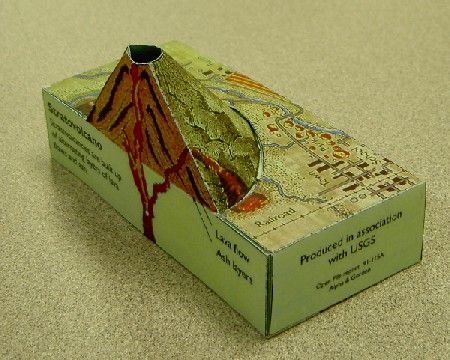
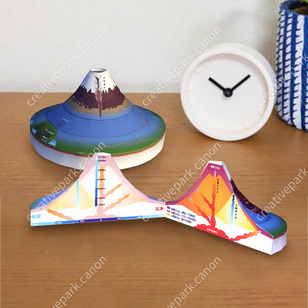
Of course, making a volcano is the ultimate volcano activity children love. Making a clay or papermache volcano is always nice but can get a bit messy. Here are some great paper volcanoes I found online.


Volcano cross section from Papermau.


Canon have a print out for Mt. Fuji. This model is beautiful!


Map of Active Volcanoes


Another activity is to make a map of active volcanoes. I provide the children with a blank world map and some good books on volcanoes, as well as the above chart (found on wikipedia). The children make their own charts and discuss where it may not be safe to live!


I am sure there are many more things which can be done about volcanoes. If you have anymore ideas please let me know.

Sunday, 18 October 2015

Free Downloads Updated

I have updated my download page and fixed any broken links.

Please find the latest verion of my downloads here. I will continue adding to this list as I post new material. Please let me know if a link is not working or if there is an error on a file. Feel free to download and use these files but link back to my blog when you share them. Do not copy or sell these files.

Language


Mathematics

Geometry


Science

Organ Cards - post

Thursday, 9 April 2015

Carbon Cycle Activities

Recently we have been working on activities to promote sustainable living. As part of this study the children calculated their carbon footprint. In order to fully understand the weight of their carbon footprint I created this carbon cycle chart.


The chart contains movable cards for each part of the carbon cycle. On the back is a description of that card and it's process.


 Once we laid out all the cards and I finished my presentation, the children were silent and their faces displayed the shock of realisation that their actions are destroying the earth. One child immediately pointed out that more carbon is being released into the atmosphere then is taken away. We discussed the side effects of excessive carbon in the atmosphere. The children left the lesson insisting that they must do something to improve the situation.


The carbon footprint worksheet was a great follow up. Each child filled out a form and all were disgusted by their results. I am sure they each went home and began thinking about switching off the lights and reusing plastic bottles.


You can download the free carbon footprint worksheet from here.

Saturday, 26 April 2014

Introduction To The Checkerboard Lesson

The checkerboard is one of my favourite pieces of Montessori materials. 5 years ago I blogged about this homemade checker board which I made  from felt.  

I have had great success introducing the checkerboard to my students. However, I have noticed that some students do find it difficult to understand the place value of each square on the checkerboard. I was recently introduced to this preliminary exercise which I have now started using in my elementary class. This lesson is great and  has been very popular :).  

It is very easy to make this activity. Each of the squares is cut out from felt. They measure 4cmx4cm. You need 10 green, 9 blue and 9 red. 
I then made label cards for each square. I have uploaded the file here to share with you all for free. 


When presenting this lesson you start with the unit row [bottom row]. You place the green square at the bottom right of your mat and label it. To the left of this you place the blue square, name as 'tens' and label. You continue placing the squares for this row until you have reached 1 million. Next you start on the tens rows by placing the ten square on the second row above the units and continue placing the squares and labeling until you reach ten million. The hundreds and thousands rows are built in the same way.

A fun extension to this lesson is to play a card game. 2-3 children can randomly select a pile of cards. Each child then has to place the labels on the correct square. The winner is the child who first places all the labels correct!

Let me know if you make and try this lesson. I'd love to know how it works for others. 

Friday, 18 March 2011

Telling the time and free downloads

The other day I put up a new analogue clock in the kitchen. All the other clocks around the house are digital. I asked Little-N to tell me the time and he couldn't!!! I was sort of shocked as he could tell them time very well more than a year ago and even though most of our clocks are digital he still sees analogue clocks around and about. I don't have all the Montessori clock materials in my new class [I had to leave those in the school I used to work in] so I quickly made some of my own materials to do with Little-N.


I did a quick hand made clock search and saw this great idea at The Homeschool Den. I decided to make my own version of it where Little-N can write the numbers. I have laminated it and he writes on it with a chinagraph pencil so that it can be reused. I also made a control version and a to and past time version. You can download them for free here.


I also made him these clock cards where he matches the times. At first he uses it with the control cards [at the top]. He can also use the handmade clock above to check his answers.
Next he uses the cards without the control as shown below.

And when he's finished he uses the control cards to check his answers.

I made these cards for o'clock times, quarter past times, half past times, quarter to times and minute times. You can get the o'clock cards for free here. The other cards are available for download here. I have made them with colour coding but left the separate words and clocks without colour coding so that all cards can be used together at the end of the lessons for a huge clock matching and sorting activity. I also made blank card for the children to write the time on or to use with digital cards.

Here is an old post for another activity that I did when helping children to understand how tell to the time.

Sunday, 23 January 2011

Working With The Sandpaper Letters


A while ago I posted about the sandpaper letters and explained how one should introduce them to a child. There are many activities you can do along side the sandpaper letters to provide a child with further practice, here are a few that I do with my children and a free download:


1. Matching objects by beginning letters.
This is by far the favourite activity that children enjoy. The child takes a basket of carefully prepared objects and matches them to the correct letters.
If you have a class of children you can store the objects in drawers as in the photograph below. If your homeschooling you can simple prepare a basket for your child and change the objects regularly.

2. Sand tray: I have a post about it here.

3. Matching pictures by beginning letter. These cards are used in a similar way to the objects mentioned above. I have uploaded the file for these cards to my material store and can be downloaded for free from here.
4. Fill in the letter craft activity. This isn't strictly a Montessori activity, but I did use it in my class at one stage. The child can take a letter sheet and decorate or colour the inside of the letter. I found that parents liked to see this activity and some creative children enjoyed it.
5. Make your own letter book: I don't have a picture of this, but its a lovely activity. The child will go through a selection of carefully selected catalogues and choose pictures to cut out that begin with the letter they are learning. The child will then stick these letters in a book. The end product will be a 26paged letter book that contains many pictures for each letter. Some children like this, but only a few actually complete the a book with the whole alphabet.

There are many many activities you can do, if you have a good Montessori compatible activity that can be done while the child is learning with the sandpaper letters, blog about it and link back to this post [or leave a comment]. It will be lovely to see what other people are doing.


Wednesday, 5 January 2011

Free Downloads

Someone notified me that the link to my free downloads is not working. I have linked to all my files here on this post. I will add to this list as I post new material. Please let me know if a link is not working or if there is an error on a file. Feel free to download and use these files but link back to my blog when you share them. Do not copy or sell these files.

Language


Mathematics


Geometry


Science

Organ Cards - post

Thursday, 9 December 2010

100 followers and literacy download


I just noticed that my blog has 100 followers! I feel so honoured and I am glad that people may find a benefit in what I write and post.

To say thank you to all my followers I have uploaded files for two literacy activities.

The first is Capital and lower case letter matching cards.

These cards should be used once the child has completed the sandpaper letters and worked with the pink series material, but before the child is reading pink level sentences or books.
To make the material print all the pages and join all the lower case letters into a strip [I did mine with cellotape], I joined my letters in two rows so that the activity doesn't take up too much space.
To present the activity: Tell the child that the letters they have learnt with the sandpaper letters are small letters [or lower case], explain that we also have Capital letters that we must use in certain words. Lay out the lower case letter strips, give the child the capital letter cards, ask him to match the cards. If a child can not match a card then he should put that card at the back of the pack. Usually a child will be able to match 60% of the letters without any help. Once the child has completed matching, simply show the child where the other letters go. Repeat the activity until the child can match all letters. As a variation the child can also match the sandpaper letters or moveable alphabet to the capital letters.

The second download is a writing activity that isn't strictly Montessori but I had it in my classroom years ago and the children loved it.
In this activity the child has dotted letter cards on which they can trace the capital or lower case letters. In the photo above the child is using a board pen, however I do not advise the use of these pens and instead we use Chinagraph pencils [grease pencil] which works better for the activity. The children can use these cards after tracing the sandpaper letters and working with the sand tray. To make the file, print all the pages and cut into individual cards.

Friday, 5 November 2010

Land water and Air: Animals and transport


Transport by land water and air.


Animals from the land water and air.

After working with the land water and air activity I have created extension cards for the children to work with that focus on transportation and animals that are found in land water and air. I have uploaded the file so you can download them here.

Monday, 25 October 2010

Land Water and Air

I recently presented this activity to a new student, Little-N joined in he hasn't done this activity for years. I made the cards for this activity years ago and I am happy to share the cards with everyone, you can download them here. While searching for the cards I found a file that I wrote explaining the presentations for this activity. I have included the explanation of this activity below.


Presentation 1:

Materials:
-Tray
-Three jars colour coded (white(light blue)-air, blue-water, green-land)
-Spoon
-Jug
-Water
-Source of mud or sand
-A word card for each land water and air colour coded

Presentation:

Lay the materials on the tray as follows: land jar, spoon, water jar, jug and air jar.
Invite the child to work with you, introduce the activity and take it to a floor mat.
Remove the jars from the tray and place them on the mat in this order, Land, water and air.
Tell the child that the first jar (land) represents land and guide him/her to put some land in it (from the garden) using the spoon. Ask the child where we can find land on the earth.
Hold the second jar (water) and ask the child to get some water in the jug and pour in into the jar. Ask the child where we can find water on the earth.
Finally hold the third jar and ask the child to put some air in the jar. Show the child how to blow in the jar. Ask the child where we can find air on the earth.
Explain to the child that on the earth of three different things land, water and air.
Next help the child to match the word cards to the jars.


Presentation 2:

Materials:
-Tray
-Three jars colour coded (white(light blue)-air, blue-water, green-land)
-Spoon
-Jug
-Water
-Source of mud or sand
-Land water and air cards
-A word card for each land water and air colour coded

Presentation:

Follow the same presentation as above.

Insure the picture cards are shuffled, explain to the child that ‘I have some pictures or land, water and air’.
Show the child the first picture, ask him/her ‘ Is this picture of land water or air?’. Guide him/her to place it under the corresponding jar and label.
Do the same with the other picture cards.

Presentation 3:

Materials: Land water and air picture cards
Labels

Presentation:

Guide the child to read and place the labels across the top of the mat, in order land, water and air.
Ask the child to look at the pictures then place the cards under the corresponding labels.
Help the child to recognize the words on the labels by using the
three-period-lesson.

Monday, 23 August 2010

Animal kingdom Questions


Recently I made these animal question cards to go with the animal kingdom classification work. I made a set for each group fish, amphibians, reptiles, birds and mammals. Each set contains ten questions that children need to research using books to find the answers. I made sure that all the answers could be found in the various books available in the classroom and I colour coded the cards so that the children would know what animal group to look for. Little-N especially loved this activity as he is very fond of all animals and he surprised me with already knowing many of the answers from his reading.

I'm not sure if this activity will be of interest to anyone, if it is you can download them here. The colour coding is Fish- green, amphibians- purple, reptiles-brown, birds-blue and mammals-red. Please make sure all the answers can be found in the resources you provide for the children so that they can find the answers without getting frustrated!

Friday, 23 July 2010

Congruent, Similar and Equivalent


I recently did this activity with Little-N and Big-S. I followed the presentation in the Geometry Album I downloaded from Cultivating Drama. We used plastic fractions that I purchased from Learning Resource. I wrote the meaning of each word on a card and drew one set of symbols. Little-N and Big-S drew their own set of symbols and used the fractions to understand the relationship between the shapes. When we finished I got them to draw shapes in their books and label them. The above book is Big-S's, her writing has come a long way and is now very neat :) as for Little-N I let him stick the definition cards in his book so that he didn't have to spend too much time writing them out. I hope one day his writing will improve.

I have made three part cards for this activity you can download them from here.