Thursday, 30 December 2010

Presentation of the Sandpaper Letters / Three period lesson


Some of my homeschooling friends have been asking me about the presentation of the sandpaper letters. I had a look online for videos or instructions but I am not very happy with what I found out there. I can't find an accurate presentation and it's crucial that the sandpaper letters are used correctly. I am sure that there are some good instructions out there, but I just couldn't find them.

The Sandpaper letters are taught using the three period lesson. You can find information about the three period lesson here and here. It is very important as a teacher or homeschooler to master the three period lesson as it is such an important teaching tool and is use throughout the Montessori method in all the different areas.

Before you begin:

The sandpaper letters should be presented after the child has worked with the 'I spy game' this will insure that the child already has some understanding of the relationship between sounds and a word. To begin presenting the sandpaper letters you must choose 2-3 letters that look very different and sound very different. I usually take the first letter of the child's name and another very different letter. The teacher/mum must sit on the child's right and this activity should be done at a table as we are indirectly preparing the child for writing later on.
Depending on the child you may want to begin by saying something like ''Remember we enjoyed working with the I spy game finding which objects begin with the different sounds? I would like to show you how we write these sounds.''. You do not have to say this, but I find that this helps the child to better understand what the letter symbols are. The child already knows about sounds, they can produce them, hear them and isolate the sound in a word, the only new thing with the sandpaper letters is recognising the symbols and associating them with the sounds.

The First Period

In the first period we take one letter, feel it and say the sound. Usually I feel and say the sound 3-4 times and then invite the child to feel and say the sound. Since I do it 3-4 times the child usually follows my lead and says it 3-4 times. I then put this letter out of sight or turn it over and place it on the side of the table. I take the next letter and do the same feel and say the sound 3-4 times and then invite the child to feel and say the sound. I then remove this letter and do the same for the third.

It is very important that the child only has one letter in front of them. This is why I remove the letters or place them face down. In the first period we are isolating each letter and providing the sound for it. We are also feeling the letter, make sure you know the correct directions for feeling the letter. If the child feels the letter incorrectly do not directly correct, just feel and say the letter again. It will take time before the child will know how to feel the letters correctly.

The Second Period

Usually we start the second period straight after the first, however if the child is struggling or has lost interest leave it for another day. Place the three letters in front of the child naming them as we place them. Then ask the child ''Can you feel 's'?', then ''Can you feel 'a'?' and then 'Can you feel 'm'?'. Next you should change the command, I have written a small list of different commands that can be used with the three period lesson.
-Can you feel
-Can you point to
-Can you hold
-Can you give me
-Can you put '' on the table
-Can you put '' in the basket
-Can you put '' here
-Can you point and say ''
-Can you feel and say ''
Choose one command and do it for the three letters. i.e. Can you give me 's'? can you give me 'm'? can you give me 'a'?. Then choose another command and do the same. Continue until you are sure that the child knows the letters. In this period we are providing the child with the sound of the letters and allowing the child to associate the sound to the letter. We are NOT asking the child for the sound of a letter or asking the child to name the letter, all the child has to do for now is associate the sound and letter symbol.

If the child makes a mistake in this period...
I have said 'Can you feel 's'?'' and the child felt 'm' instead. I will simple say 'This is 'm' while pointing to 'm' and then say 'can you feel 's'?. This way I am not saying no or making the child feel that they have failed. I am also giving the child the sound for the letter they picked incorrectly and asking them to find the 's'.

You should continue with the second period until you are SURE the child knows the letters. This period is long. Make sure that you give the child plenty of opportunity to feel and say the sound [repeating after you] in this period.

My own style of ending the second period is to ask the child to feel and turn over each letter. This way no letters are showing so when I come to the third period I just turn over the letters...

The Third Period

Usually I start with this period by saying 'Do you think you can tell me what these letters are?' Point to a letter [or turn over a letter if you have placed them face down] and ask the child to name and feel it. If period one and two were done correctly the child should be able to do this no problem. Do the same for the second and third letter.

After the 3-period lesson

If the child was successful with recalling the sounds for the letters then the next step is to take one letter i.e 's' and ask what begins with 's'. Help the child to name some words that begin with 's' [snake, sun, strawberries]. Do the same for the other letters. Once you have done this the activity has finished.

I hope to write a few posts about activities that can be done after the sandpaper letters.

A few tips

-Always start with the first period even if you are returning to this activity.
-Make sure the child feels and says the letter sounds at the same time.
-Make sure the child is producing the letter sounds correctly. The letters should be said as 'mm' and not 'maa'.
-Each time you present this activity start by reviewing all the letters the child has taken previously and then do the three period lesson for the new letters. If the child forgot some letters do a three period with those letters. To review the letters simple point at the letter and ask the child if they can remember the sound for the letter and feel it. If the child can't remember then ask him to feel the letter. Feeling the letter will activate the child's kinaesthetic memory and may help the child remember the sound.
-A master Montessori teacher once told me that to make sure the child does succeed always start each new period with the letter that was last used in the previous period. This way the child has that letter sound fresh in their mind and will be able to recall it with ease.

You can use this description of the three period lesson to teach new language or concepts.

If you have any questions please ask me and I will answer it as soon as possible.

Thursday, 9 December 2010

100 followers and literacy download


I just noticed that my blog has 100 followers! I feel so honoured and I am glad that people may find a benefit in what I write and post.

To say thank you to all my followers I have uploaded files for two literacy activities.

The first is Capital and lower case letter matching cards.

These cards should be used once the child has completed the sandpaper letters and worked with the pink series material, but before the child is reading pink level sentences or books.
To make the material print all the pages and join all the lower case letters into a strip [I did mine with cellotape], I joined my letters in two rows so that the activity doesn't take up too much space.
To present the activity: Tell the child that the letters they have learnt with the sandpaper letters are small letters [or lower case], explain that we also have Capital letters that we must use in certain words. Lay out the lower case letter strips, give the child the capital letter cards, ask him to match the cards. If a child can not match a card then he should put that card at the back of the pack. Usually a child will be able to match 60% of the letters without any help. Once the child has completed matching, simply show the child where the other letters go. Repeat the activity until the child can match all letters. As a variation the child can also match the sandpaper letters or moveable alphabet to the capital letters.

The second download is a writing activity that isn't strictly Montessori but I had it in my classroom years ago and the children loved it.
In this activity the child has dotted letter cards on which they can trace the capital or lower case letters. In the photo above the child is using a board pen, however I do not advise the use of these pens and instead we use Chinagraph pencils [grease pencil] which works better for the activity. The children can use these cards after tracing the sandpaper letters and working with the sand tray. To make the file, print all the pages and cut into individual cards.

Thursday, 2 December 2010

Numbers from 1-10

When one of my students first joined in October he would count up to 10 but missed a few numbers here and there. He could recognise 1,2,3 and 5 and then just guessed at the other numbers. After 5 weeks and only 10 days of actually coming to my class he is now ready to move beyond 10. Here are some of the activities he worked with not all the pictures are of him working but he did complete each activity:

Large number rods and cards. That is Little-N when he was three!!! Oh I miss how small he was!

The spindle box

Number cards and counters: All counters should have been the same colour but unfortunately I only had these.

Small number rod and cards.

Sorting the beads, counting and then finding the number card.

Short bead stair matched with the number cards.

Sand tray for writing

A younger student has been practising writing in the sand tray. Instead of sand I used salt and I think that it gives a cleaner look [perhaps because most of the furniture in my class is white]. This child does not yet like to write, colour, draw or use writing instruments. He really enjoyed writing in the salt tray and worked with this activity for a good 20mins going through every letter that he knew. It is important that the child feels the sandpaper letter correctly before tracing it in the salt/sand. When I present this activity I feel the sandpaper letter 3 times and then trace the letter in the sand/salt.

Practising times tables


Little-N has been practising his times tables using the hundred board and transparent counters. This activity not only provides the opportunity for him to practice the tables but also allows him to visualise the patterns the each table creates.

Wednesday, 24 November 2010

Missing teeth!

Little-N is loosing all his teeth!

Montessori I SPY sound game

Before introducing your child to the sandpapers it is extremely important to work with the Montessori 'I spy game'. The 'I spy game' helps to make children aware of the different sounds in a word. The game is played at various different levels, level 1 is very concrete and the child will work through the levels until they are able to identify all the sounds in a given word. Here is a quick description of how to present this activity.

Level:1
Materials needed:
-A special box
-A few objects that start with clear sounds, make sure the child is familiar with the names of each object [for this example I have a dog]
-Mat for table
Presentation:
Take an object from the box and place it on the mat. Say 'I spy with my little eye something beginning with 'd' 'd''. Make sure that you say the sounds correctly, it should be short 'd' and not 'da'. Since there is only one object on the mat the child will be able to succeed and reply 'dog'. Reply 'I spy dog' and emphasis the 'd' in the word. Put the object back in the box and take another object, repeat the activity for the other object. You can continue this game with as many objects as the child needs. I've had children play this for 20min and more.

Do not move onto the next step until you notice that your child is becoming aware of the initial sound in each word. This may take days, weeks or months. Be patient and continue, change the objects and change the placement of the objects to keep it interesting.

Level:2

By now the child should have developed some awareness of the initial sound in a word. On the mat place two objects with contrasting initial sounds. Say to the child 'I spy with my little eye something on the mat beginning with 'mm' 'mm'. The child now has to choose between the two objects on the mat. If the child has mastered level 1 hopefully they are able to distinguish the sounds and choose the correct object. If the child chooses the wrong object, in this case the dog simply reply ''d' dog, I spy something beginning with 'mm''.
Continue working with two objects at a time. As the child succeeds at the activity gradually increase the number of objects.

Level 3: In this activity you use the environment [room, car, garden]. Choose a sound that represents more than one item in the environment, for example book, basket, ball. Say 'I spy with my little eye many things that begin with 'b'. Encourage the child to find as many objects as possible.

Once the child has mastered this step then they are ready to start the sandpaper letters. The I spy game doesn't end here, continue to work through the different levels, it is still very important that you do this as this will help your child to isolate each sound in a word and ensure that they will be able to successfully work with the pink series and moveable alphabet later on.

Level 4: Now we are focusing on the ending sound of a word. It is easier to limit you objects to three letter phonetic words like dog, cat, pot.
Place two objects on a mat that begin with the same letter but end in different letters for example peg and pin. Say, 'I spy with my little eye something on the mat that begins with 'p' and ends with 'g''. Usually the child will not get this first time, if the child chooses the pin say 'Yes pin begins with 'p' but I spy something the begins with 'p' and ends with 'g'. Lets listen the the ending sounds, p i n, p e g. Then repeat I spy....'g'.
Once the child has mastered this level they will be able to identify the beginning and ending sound of a word.

Level 5: Once level 4 is mastered play the 'I spy game' with the middle sound. This can be very difficult, make sure you have three letter phonetic objects and help the child to sound out the word.

Please note that during these activities you do not show or teach the letter symbols, this activity is an auditory activity and the child should focus on hearing the sounds in a word. If you do the letters at the same time then they child is likely to get confused.

Begin presenting the sandpaper letters after the child has mastered level 3, but do this as a separate presentation/activity.

Do not get frustrated and stressed if the child is not mastering any of the levels, you can continue with each level as long as the child is happy and interested. If the child is unhappy or uninterested it may be because the child is simply not ready. In that case the best thing you can do is put the activity away and try again in a few weeks. But do try it again as this activity is extremely important for many of the later activities in the language area.

If you have an older child who is having difficulty spelling phonetic words, work through this activity and increase the difficulty by having objects with similar sounds like 'b' 'p'.

Those of you who I am helping through your home-schooling journey, try level 1 and 2 and then report back to me on how the activities went!!

Wednesday, 17 November 2010

Pink tower and broad stair

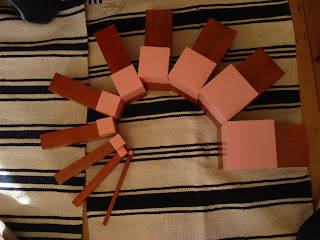
Here are some ways that Little-M built the pink tower with the broad stair.


New addition: Aslan

Although I already have four of my own cats I could not resist having one of Annabel's kittens. I fell in love with this kitten: Aslan right from the beginning. He's grey, fluffy and so clever! There is something special about grey tabby cats, clever, affectionate, cute and funny. I was really worried about how my four other cats would react to a new addition, thankfully it all went well.


Tinkerbell [above] and Smittens [below] are Aslans sister and brother from the previous litter. Tinkerbell immediately took the role of a mother, cleaning him and teaching what to do. Smittens took the role of a big brother protecting him and playing with him. I didn't expect my cats to react to him in this way, as you can see from the pictures Aslan is very comfortable in my home.


He follows me round the house all day and sleeps besides me in bed at night. He is always climbing onto my lap where he manages to get under my top and falls asleep. And as I write this he is nibbling and licking my hand as if he knows this post is all about him!

Friday, 12 November 2010

Developing concentration, going back to the beginning

As I mentioned in a previous post one of my newer pupils Little-M needed many activities to develop his concentration and coordination. Although Little-M is 5yrs, I decided that the best way to do this was to go all the way back to the beginning. I started by introducing the early practical life and sensorial materials. Yes that means that at 5 he worked with the pink tower and even spooning exercises. I took him through the activities at a quicker pace then one would working with a younger child. Here are pictures of some of the activities he worked with.


Working with these activities were very beneficial for him, his concentration increased, coordination developed and he learn the gentleness and precision that one must work with when doing an activity. Going through these simple activities also ensured that he doesn't have gaps in his learning and that he has developed a stable foundation to build upon.

Some parents may have view his work as unimportant or time wasting, however Little-Ms mum was fully supportive. Now that he has completed many of the early activities he can now move onto more complex tasks and benefit appropriately from them.

If your starting Montessori with an older child it is always a good idea to take the time to go all the way back to the beginning and work with the early activities no matter how simple they appear to you. It is also the indirect aims of each activity that we hope the child will acquire and these will ensure that your child does better in the later activities.

Wednesday, 10 November 2010

Studying the Earth

This is the latest activity that I made for Little-N. With this activity he learnt about the different parts of the Earth.
To demonstrate this activity I made a globe from a plastic sphere container that came with Little-N's socks. I painted it from the inside, starting with the land and then covered it with blue for the ocean. I then made two holes at the north and south pole so that I can fit a skewer through it.

First I explained to Little-N that the earth spins but it doesn't just spin anyway, it spins on an axis. I explained that we can imagine this axis as a straight line going through the earth. We placed the skewer through the earth and Little-N span it towards the east. Next we covered the north pole and south pole.
I placed the skewer in foam so that it supports the Earth with a tilt and I explained to Little-N that the earth axis is tilted at 23.5 degrees. I then drew a line on the globe with a board pen at the equator and explained to Little-N that this is an imaginary line.We then looked at the northern hemisphere and the southern hemisphere.
Here are the cards that I made for Little-N to match. I have put them up for sale in my Lulu shop here.

On another day we revised the previous lessons and I went on to draw the lines of latitude and longitude on the globe. We also covered the major circles of latitude. This time I made the information cards differently, I wrote them as quiz cards so that Little-N had to use his understanding of this activity to match the cards.

Friday, 5 November 2010

Land and water on a map

After working with the land and water globe this student went on to do a simple activity where he first colours the land with a brown wax crayon and then paints the water on top.

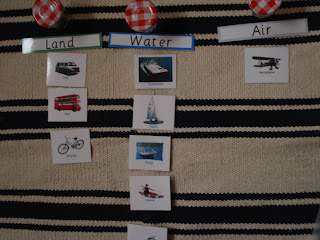
Land water and Air: Animals and transport


Transport by land water and air.


Animals from the land water and air.

After working with the land water and air activity I have created extension cards for the children to work with that focus on transportation and animals that are found in land water and air. I have uploaded the file so you can download them here.

Presentation of Day and Night

A picture taken while presenting day and night to Little-N.

Home made Montessori bead cabinet

I've finally finished making my bead cabinet. I used scrap wood that I took from an old chest of drawers. It is narrower than the usual cabinet and I have hung the short bead chains instead of lying them on the shelves. I am hoping to add another shelf at the top to house the bead cubes.

Wednesday, 27 October 2010

Kittens!


The kittens are now 6 weeks!