Showing posts with label science. Show all posts

Monday, 24 October 2016

Great Lesson 1 : The Atom [Post 8]

A lovely follow up for the first great lesson is to look at atoms, molecules and the periodic table. 

Atom 3-part Cards


To start off with, the children are reminded of the elements mentioned in the great lesson.  They are then introduced to the parts of the atom using these three part cards. These cards can be purchased from my Montessori Material Store here alongside some using worksheets.


Next, I encourage the children to make their own model of an atom based on what they have understood. This allows them to demonstrate their knowledge and get creative. Here are two models Noah made back in 2014.


Next, we begin constructing atoms and comparing them. To do this, the children need to be introduced to the periodic table and atomic number. I will post about the periodic table lessons separately. 

Atom Board

A lovely material for construction of atoms is the Bohr Board. I didn't want to spend $120 so I decided to make my own. It was so easy and the children loved it. 


I started off with a square piece of plywood 50cm x 50cm. I marked on the shells using a pen and compass. The holes for the electrons were made using a Stanley knife. It's important to make the exact number of holes in each shell. 


This photo shows a better view of one I made on the bottom shelf. This one has a lovely wooden grain which added to the beauty of this material.


We used the beads from the small square peg board as protons, neutrons and electrons. The protons and neutrons were placed in a cup at the centre of the atom. The cup isn't showing in this photo as Noah is filling it up. The electrons sit in the little holes.


I printed out this period table and cut it into individual cards. The children use these as a guide for placing the electrons when constructing atoms on the Bohr board. 


I found some lovely examples of Bohr Boards on these blogs:


Next, I encourage the children to select their favourite elements and make charts or diagrams like this lovely one. The flags are labelling the parts.


Some children decide to make a booklet of the first 20 elements or so using the worksheet included in my set above.

Saturday, 24 October 2015

Great Lesson 1: Volcano Studies [Post 4]

After telling the first great lesson each year, the most loved follow up work is always the volcano activities. Here are some ideas I use in my class and my children enjoy.


Volcano Experiment

Firstly, I always have two volcanoes on display. One is my grand big brilliant volcano which I use for lessons. The second is a much smaller one which children can use independently. The children are able to take out the smaller volcano anytime and follow the instructions to make it erupt. 

The main volcano in the picture shows my large grand one. Just behind the white box you can see the top of a smaller volcano.

In the white tray I have a supply of vinegar and baking soda. The children use a spatula to fill the volcano with baking soda and a pipette to add the vinegar. This way they don't use to much of the ingredients at once. 

As you can probably tell from the photos, these volcanoes are handmade. Both volcanoes have removable bottles which make them easy to clean. I used this youtube video, but did not follow the exact instruction.


Montessori Beginnings has another good tutorial on how to make a volcano.

Each of these volcanoes has a built in tray which holds the lava and mess from the eruption. This has been perfect for avoiding the terrible disasters I previously had when the volcanoes stands in a separate tray.


Parts of a Volcano

 Alongside the volcanoes, children will work with the part of the volcano cards. I have a set available at my store, shown below and available here


http://thelearningark.com/content/part-volacano


Alongside the volcano cards, the children use the above printout to make their own volcano booklet. This is available for free here. The picture of the volcano was taken from Free Colouring Pages.

Of course the volcanoes make appearances in various other lessons. Below, I was presenting a lesson on the use of a comma and a child decided that the volcano was the perfect prop to use.


Types of Volcanoes

I used this great chart to make three part cards for types of volcanoes. I am not sure who is the author of the chart so I can't share the cards. The chart is available here. 


Real Volcanoes

It is also great fun for the children to look at real volcanoes. 


Helpful garden has a free download for pictures of volcanoes. 


Pinay Homeschooler has a free set of volcano cards from around the world. 


Volcano Research

For children who have a great interest in volcanoes, I encourage them to carry out research on an actual volcano. The below picture shows research guidelines which the children use as a basis of their research. Unfortunately, I can't remember where the pictures came from so I can't share this. Sorry!


Make a Volcano Model

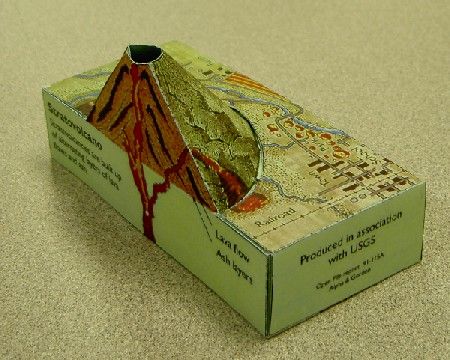
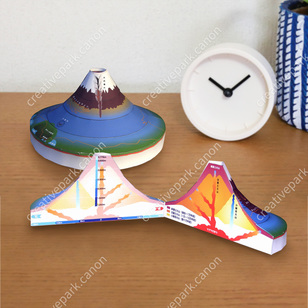
Of course, making a volcano is the ultimate volcano activity children love. Making a clay or papermache volcano is always nice but can get a bit messy. Here are some great paper volcanoes I found online.


Volcano cross section from Papermau.


Canon have a print out for Mt. Fuji. This model is beautiful!


Map of Active Volcanoes


Another activity is to make a map of active volcanoes. I provide the children with a blank world map and some good books on volcanoes, as well as the above chart (found on wikipedia). The children make their own charts and discuss where it may not be safe to live!


I am sure there are many more things which can be done about volcanoes. If you have anymore ideas please let me know.

Sunday, 18 October 2015

Great Lesson 1: Experiments on laws of the universe [Post 3]


After telling the great lesson, I try to present the Laws of the Universe experiments daily. I only set up a few experiments on my shelves. For the rest, the child chooses a card, gathers the materials needed and carries out the experiment following the directions.

Experiments set up and ready to explore,

The blue drawers contain additional apparatus for other experiments. 


I use Montessori R&D experiments for the younger children. A sample of their experiments can be found here. I printed each experiment and statement on an individual card. Unfortunately, I can not share them on here due to copyrights.

I used the experiments from Montessori for Everyone for my older children. They can be found here.

Free Downloads Updated

I have updated my download page and fixed any broken links.

Please find the latest verion of my downloads here. I will continue adding to this list as I post new material. Please let me know if a link is not working or if there is an error on a file. Feel free to download and use these files but link back to my blog when you share them. Do not copy or sell these files.

Language


Mathematics

Geometry


Science

Organ Cards - post

Thursday, 22 December 2011

Semi Precious Rocks


Little-N has developed a huge interest in semi-precious rocks and gems.  He started to collect rocks and gems and I was amazed at how quick he was able to build a collection from little gifts from friends and family. We bought him these books and he has read them cover to cover.


Little-N used the books to identify his small collection of rocks. I came across this amazing precious rocks,  gems and minerals magazine collections which I bought him as a gift. Each fortnight Little-N receives a magazine with a rock or gem. The collection is brilliant, the stones are huge and the magazines are so informative. So far Little-N has received gold, amethyst, rose quartz, blue agate, desert rose, obsidian and geode.


He started to look into birthstones and was eager to identify everyone's birthstone. I made him these birthstone cards.


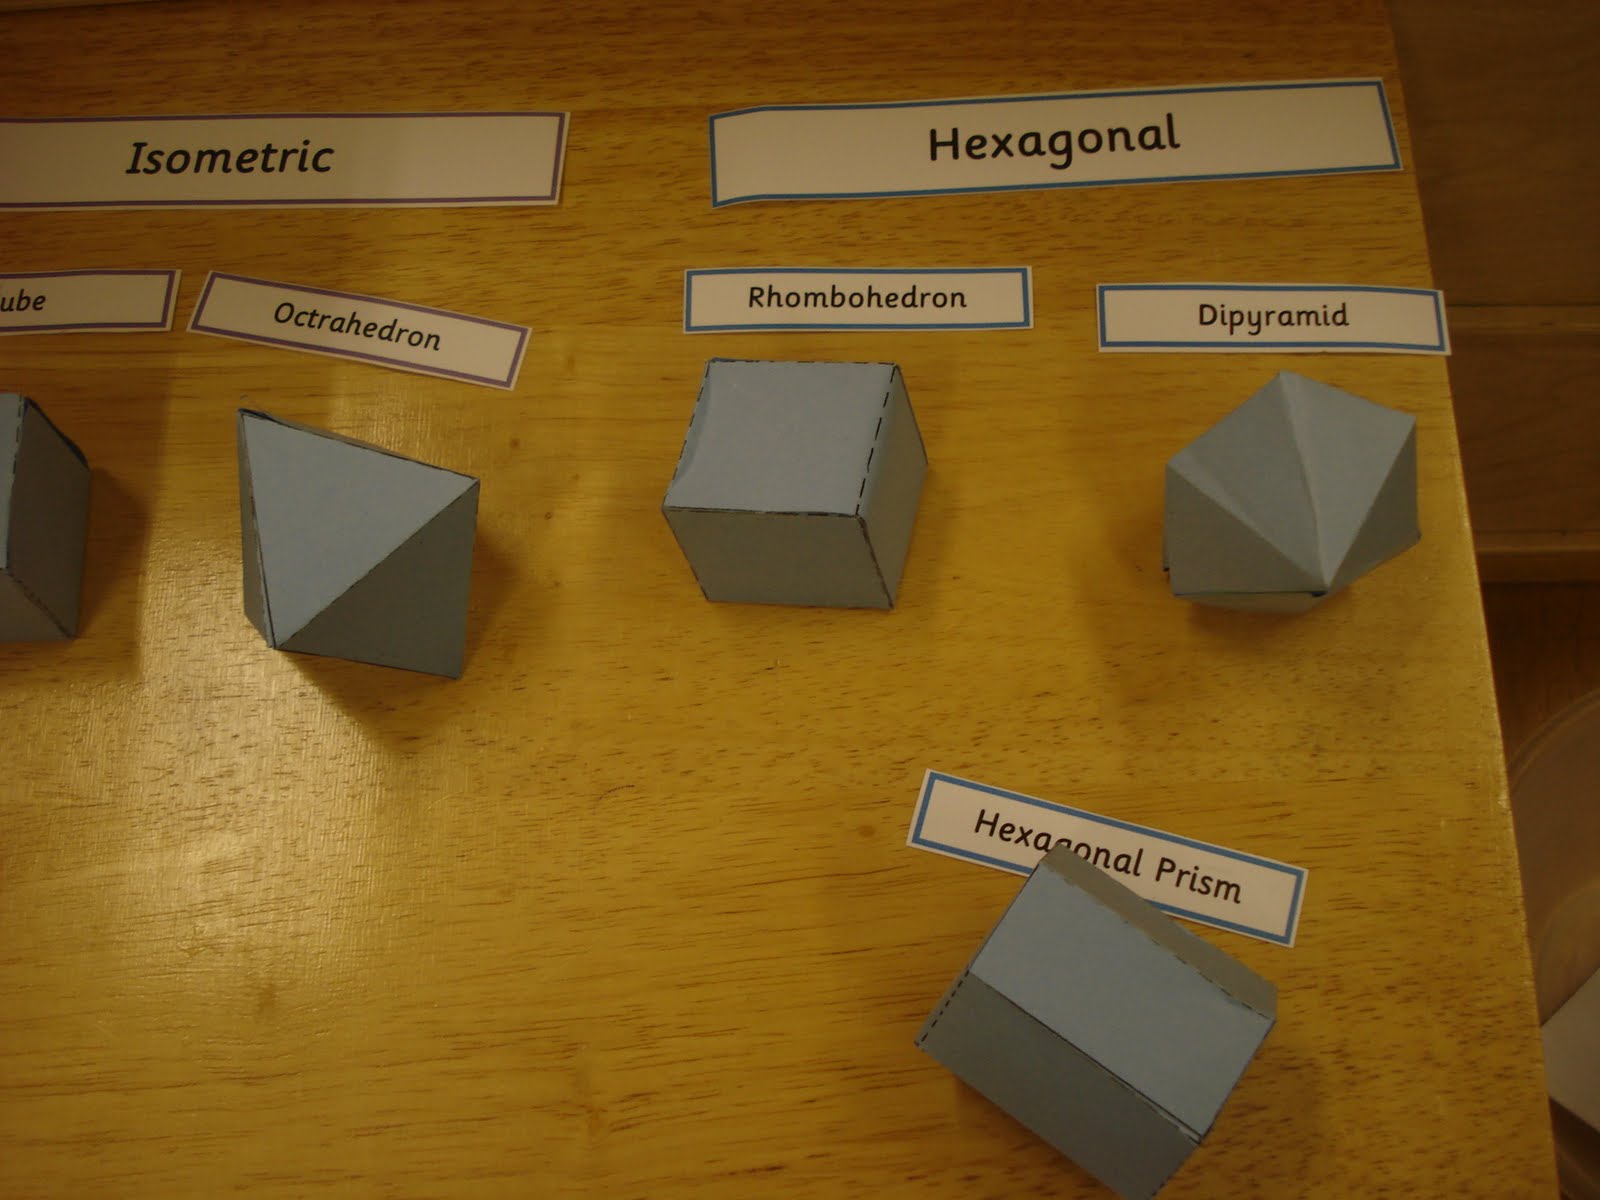
When Little-N gets interested in a subject he becomes totally obsessed. He sat and research each rock making what he calls 'fact files' about each rock. He drew picture after picture of different rocks. He started to talk about crystal shapes and taught himself the names of different mineral crystal shapes. I printed him a set of cut out crystal shapes that he could assemble himself. I also made him colour coded name cards so he can sort and name the shapes. This is how he set up his work:


My husband took Little-N to the natural history museum where he had the opportunity to see and identify many precious rocks and gems. 


Little-N's favorite precious stone is diamond, he asked if I could buy him some but I told him he'll have to wait till he's older. His next favorite is emerald and he is eagerly awaiting the emerald magazine that comes with his collection.

Friday, 19 August 2011

Little-N's beanstalks

This summer Little-N has been enjoying the garden. Here are some photos of the beans he planted:

Little-N noticed how the beans bent towards the sun.


When the plants were big enough we planted them in the vegetable patch with some bamboo sticks.


The beans grew very quickly.


Little-N enjoyed searching for the beans and picking them.


He washed and cut the beans.


He cooked them with some garlic, butter, salt and herbs.


And proudly served it to us for dinner.
He has kept some beans for drying out and planting next year.

Little-N was so happy to completed the the cycle of cooking by planting, caring, picking and cooking.

Wednesday, 27 April 2011

Planting Vegetables

Last year I was envious of my mother in-laws garden. Every time we visited her we had salad freshly picked from her garden. This year I am growing my own. Here are some pics of Little-N planting seeds.
First he filled the recycled tub with compost. [Can you see those little cat ears? totally cute]


Then he made to grooves in the compost and sprinkled the seeds.


Next he covered the seeds with compost and watered it.


And of course he wrote labels to make sure we know what's growing. The seeds will be kept in a mini green house until their ready to be moved to the soil.

So far we've planted:
-Lettuce
-Broccoli
-Cucumber
-Radish
-Aubergine
-Carrots

Wednesday, 9 March 2011

Recording Temperature

Thanks to everyone who left me a comment on my last post, your support and encouragement is much appreciated. Now that my class is set up I can work on more projects with Little-N, here is our latest. I got Little-N a window thermometer and he is recording the temperatures throughout the day.

I made him this little chart to record the temperatures and we will use the information form it in later project. Using a thermometer has broadened Little-N's understanding of negative numbers.

Wednesday, 10 November 2010

Studying the Earth

This is the latest activity that I made for Little-N. With this activity he learnt about the different parts of the Earth.
To demonstrate this activity I made a globe from a plastic sphere container that came with Little-N's socks. I painted it from the inside, starting with the land and then covered it with blue for the ocean. I then made two holes at the north and south pole so that I can fit a skewer through it.

First I explained to Little-N that the earth spins but it doesn't just spin anyway, it spins on an axis. I explained that we can imagine this axis as a straight line going through the earth. We placed the skewer through the earth and Little-N span it towards the east. Next we covered the north pole and south pole.
I placed the skewer in foam so that it supports the Earth with a tilt and I explained to Little-N that the earth axis is tilted at 23.5 degrees. I then drew a line on the globe with a board pen at the equator and explained to Little-N that this is an imaginary line.We then looked at the northern hemisphere and the southern hemisphere.
Here are the cards that I made for Little-N to match. I have put them up for sale in my Lulu shop here.

On another day we revised the previous lessons and I went on to draw the lines of latitude and longitude on the globe. We also covered the major circles of latitude. This time I made the information cards differently, I wrote them as quiz cards so that Little-N had to use his understanding of this activity to match the cards.